
The first grade classes at my current school recently completed a gorgeous cherry blossom project. It had some similarities to one I'd done in the past, with both 8th graders and preschoolers. I came here to look up the pictures and realized I'd never posted them! When I dug them out, I came across a happier surprise - the last time I did the cherry blossom project, I displayed it with a printmaking project I came up with on my own - and really like, as it teaches students about three different types of printmaking, requires the students to take care in their craftsmanship, and can be done without a ton of special printmaking supplies.

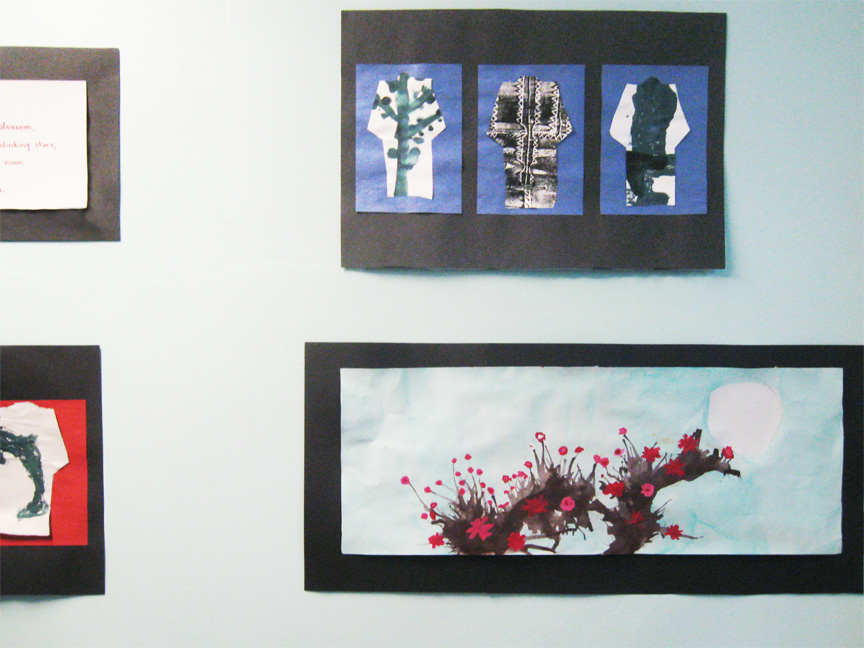
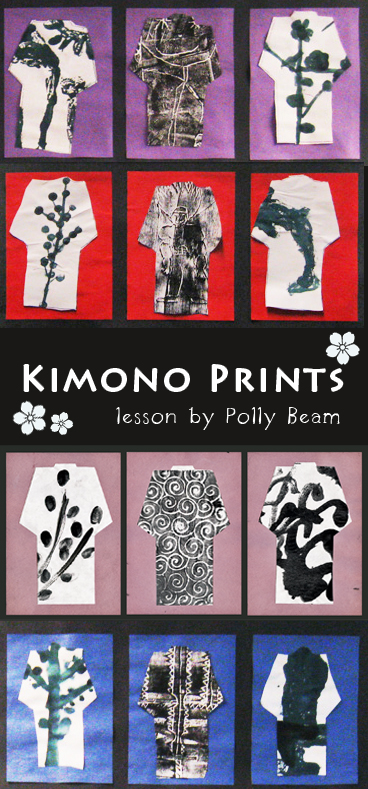
This is my teacher sample. For this project, you need three 12"x18" sheets of paper per student - one white drawing paper (or heavier), one colorful construction paper, and one black construction paper. You also need black printing ink or paint (ink has a better consistency), a 4"x6" styrofoam or foam plastic sheet for every student, pencils, brushes, scissors, glue sticks, and a brayer. The last thing you need are a few kimono-shaped tracers for the kids to share - it's really simple to create your own using a few pieces of cardboard or cardstock. Make the shape about 3"x5".

For prep work, I trim the black paper down to 10"x16". I also cut the colorful paper and the white paper into 4"x6" squares. (If you're doing the math in your head, you know you can get away with fewer sheets of these last two than you have students.)
Once the students arrive, we look at some images of kimonos. We also
talk about different methods of printmaking - for this project, you're
going to be using fingerprints, monotypes, and relief printing. One the
first sheet of white paper, I have students use brushes (now, I would
probably swap these out for cardboard squares, using the edges to print)
to create branches. Then the dip their finger in the paint or ink and
press it to the paper repeatedly to create "blossoms".
For your next set of prints, discuss
monotypes. Monotypes are one of a kind prints, where you paint on a
surface (usually glass or plexiglass) and then make a print or two from
the painting. (The second is usually a "ghost" print.) Have your
students paint an image on their foam sheet, then gently press it
face-down on a piece of white paper to create a monotype.
The
final print is a relief print. Use a pencil to carve a design into the
other side of your foam sheet. It can take a bit of practice to get it
deep enough to indent, but not so deep to break the foam into bits. Once
your image is complete, ink it using a brayer and then print it on your
final sheet of white paper.
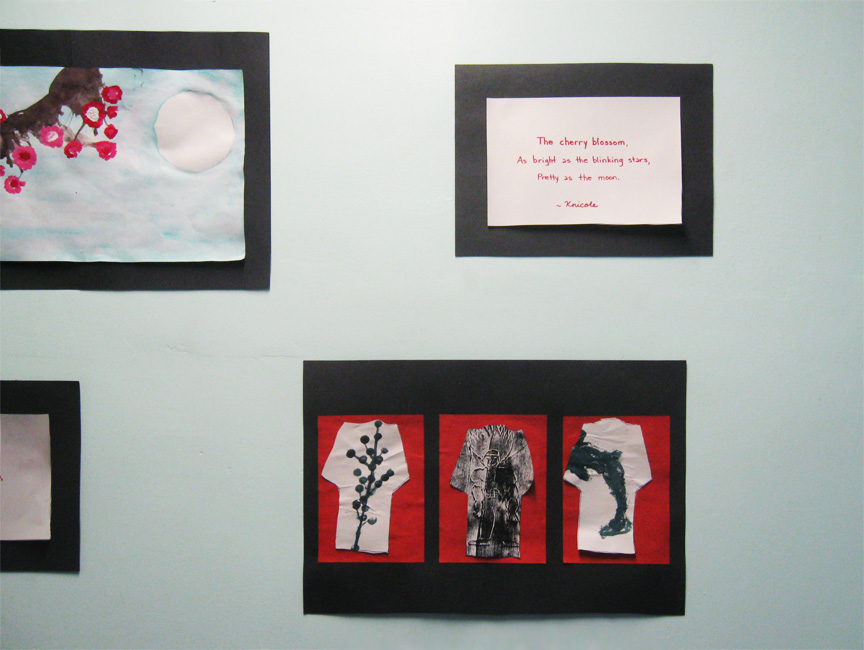
Once all your prints have dried, flip them over and trace the kimono shape on the back. Cut out each shape and glue it down on a colorful background. (I've had kids ask me if they can use multiple colors, and I generally say no - I've found it distracts from their awesome prints.) Then, they arrange all three rectangles on the large sheet of black paper, working carefully to space them out evenly and keep them level with the edges of the page.
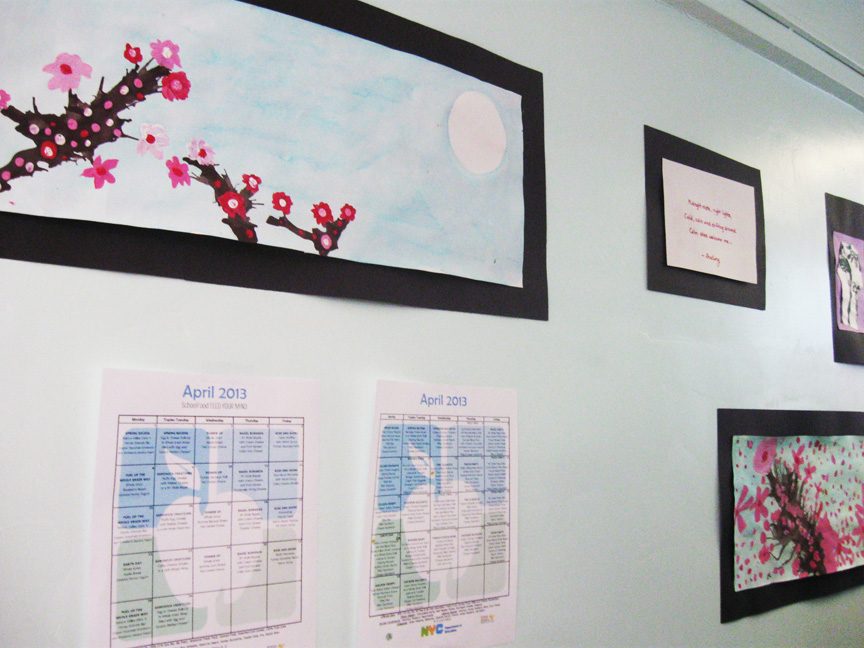
For the cherry blossom images, I got the idea online - trace a circle on a long sheet of paper (as the moon) and use watercolors to paint the background blue for the sky. Take very watery tempera paint and use a brush to dribble it in a short line on your paper. Then take a straw and use it to blow on the paint. (Have your students pace themselves - it's easy to get light-headed!) Repeat these steps till you're happy with the amount/length of your branches. Once your branches have dried, mix white and magenta tempera paint to create blossoms. I generally let the students experiment with blossom shapes on a separate sheet first, figuring out how they'd like to paint them.
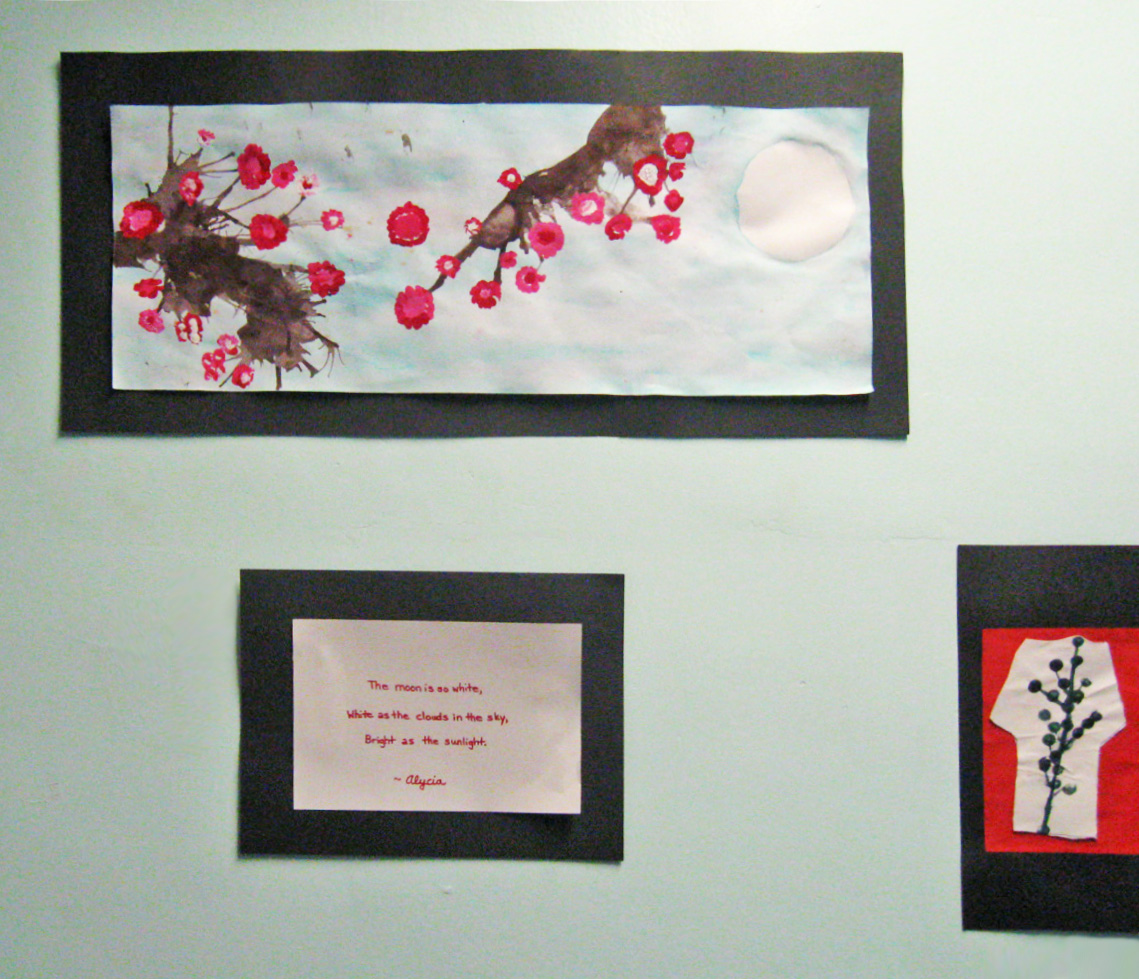
Finally, the last time I did this lessons with 8th graders, I paired it with a short lesson on haiku poetry. I was a little amazed my students in the Bronx claimed to have never studied haiku. If you're not familiar, it's a poem with three lines - the first is five syllables long, the second seven, and the third five. If I was doing this lesson now, I'd include this clip from Avatar: the Last Airbender as an example.
No comments:
Post a Comment